Partitioning your hard drive in Windows is a great way to organize your files and folders. It’s a feasible method to give your system multi-drive functionality without having to buy a second drive. Partitioning your hard drive in Windows is very simple, but let’s go to the basics and understand a bit about partitioning.
What Is Partitioning?
Partitioning a hard drive means sectioning off a part of the hard drive and making that part available to the operating system.
Reasons Why You Should Partition A Hard Disk
- A new hard drive is more useful when partitioned to save data.
- Partitions can be used to organize data according to their type.
- Windows can easily be reinstalled without affecting the installed programs since the boot files are safely stored in the system partition.
- Partitions make data recovery convenient and efficient.
How To Partition A Hard Drive In Windows
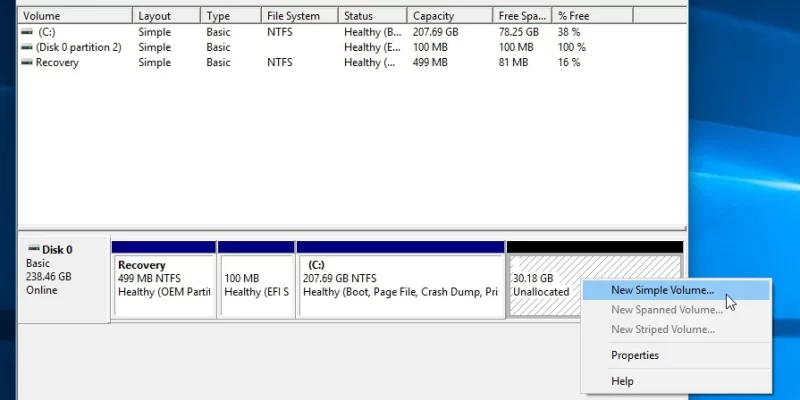
Before you start, check if you have unallocated space on your computer disk.
- Right-click on the Windows icon, and click on Disk Management. Alternatively, right-click on This PC and select Manage.
- Right-click on the hard disk partition that you want to shrink and select Shrink Volume from the drop-down menu.
- The PC will then calculate how much free space you can allocate the new partition. Enter the amount of space you want to shrink in MB, then click on the Shrink button. Wait for the process to complete to get an unallocated space.
- Right-click on the unallocated space on your hard disk, and select New Simple Volume from the menu.
- In the New Simple Volume Wizard interface, click Next.
- Enter the size of the volume you want to create in MB or accept the default size and select Next.
- For File System, choose NTFS.
- Add a Volume Label you desire.
- Click Finish to complete a new partition.


Comments