You’ve probably had your PlayStation 4 console for quite a while now and even though all is well, bad things happen for something that is overused…or almost. The PS4 controller is one of the factors that may give a headache when you start noticing some problems with its power or charging capabilities. And with the fact that the controller never seems to bet any cheaper, here’s how you can actually fix the dead battery at the comfort of your home.
The controllers aren’t cheap but we have found batteries to be surprisingly cheaper which you can get at online stores. What you might need to be careful of is being sure you want to do this if you are already out of your warranty time. If your warranty is still valid, it might be best to just take back the controller for proper repair.
Steps
- You might, first of all, need a crosshead screwdriver to unscrew all the screws on the back of the DualShock 4. Make sure to keep them very safe as they are oddly tiny.
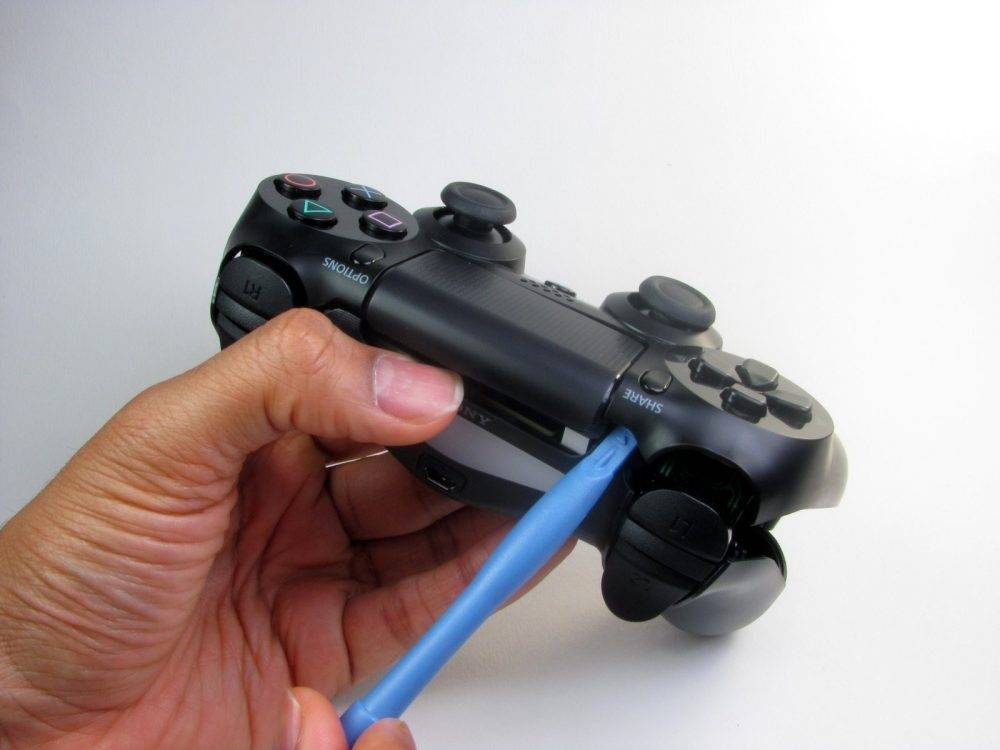
- The next tool you’ll need is a small plastic pry bar or anything similar. Squeeze the left handle on the controller’s bottom to give you space for inserting the pry bar into it.
- Lever down the pry bar to pop open the cover.

Source: Android Central
4. Move the pry bar around the front of the controller to get the case as loose as possible.
Start off your week with tech news recap and trending conversations in your inbox
5. Use the pry bar on the back near the Start and Options button. Be careful; three little pieces will come out as you do. These will need to go back in before the end.
Source: Android Central6. With the pry bar still, carefully lift the controller’s top from the bottom and make sure you do not break the small ribbon on the inside.
7. Cross-check how the ribbon is placed so that you can return it in the same way when you’re done.
8. Remove the ribbon to separate the two halves and be careful as well with the connector that is delicate.

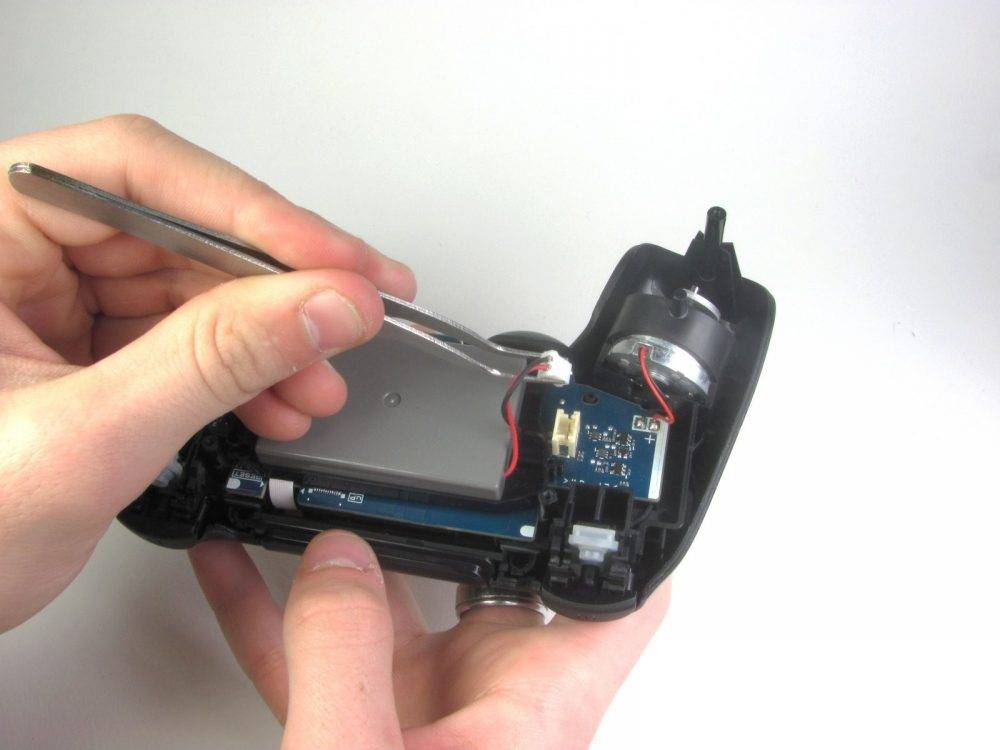
Source: Android Central9. After you can see the battery at the central point, try and locate its connector.
10. Using a pair of tweezers, if available, lift off the connector from its socket and be careful to not damage or yank it out.
Source: Android Central11. Place the battery into the slot and attach the connector back into the socket, making sure to put it in the right way.
12. Reverse this entire step by step guide to putting the PS4 controller back together. Make sure you put the three small pieces back into place, as well as making sure to close the body together firmly.
Again, be extra careful with every step so that you don’t end up losing your controller. You’re welcome!


References:
Lollybet Casino Gutschein wiki.zr.ru
References:
Lollybet Casino Mindesteinzahlung http://images.google.lu/url?q=https://lollybet.com.de/